
Build the connection
Here’s a step-by-step guide on how to set-up your new SMARTLIVING.PH Universal Smart IR Remote. Please note that updates to the Smart Life app might slightly change the interface over time but the set-up process should be the same.
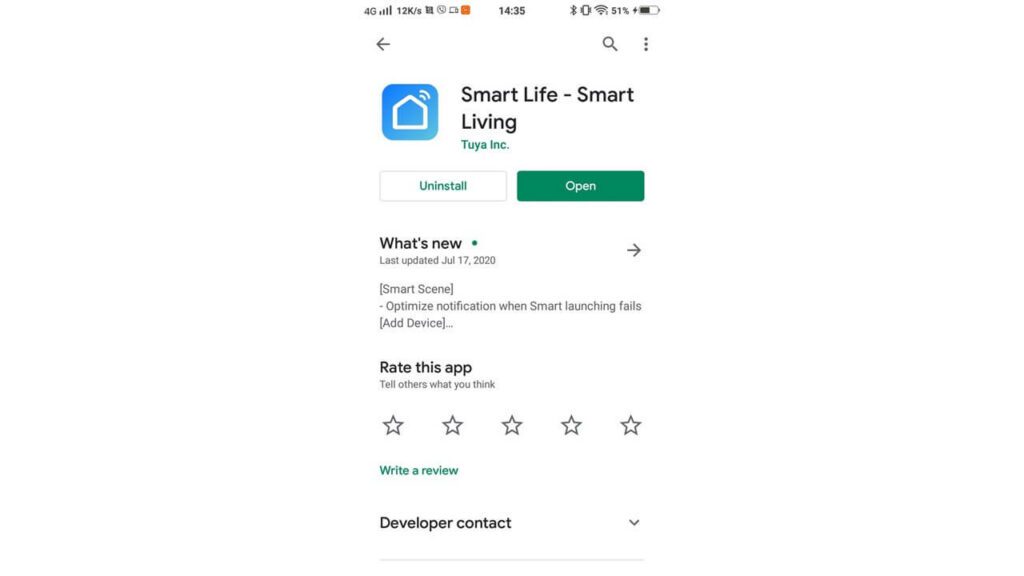
1. Download the Smart Life app from the Google Play or Apple Store.
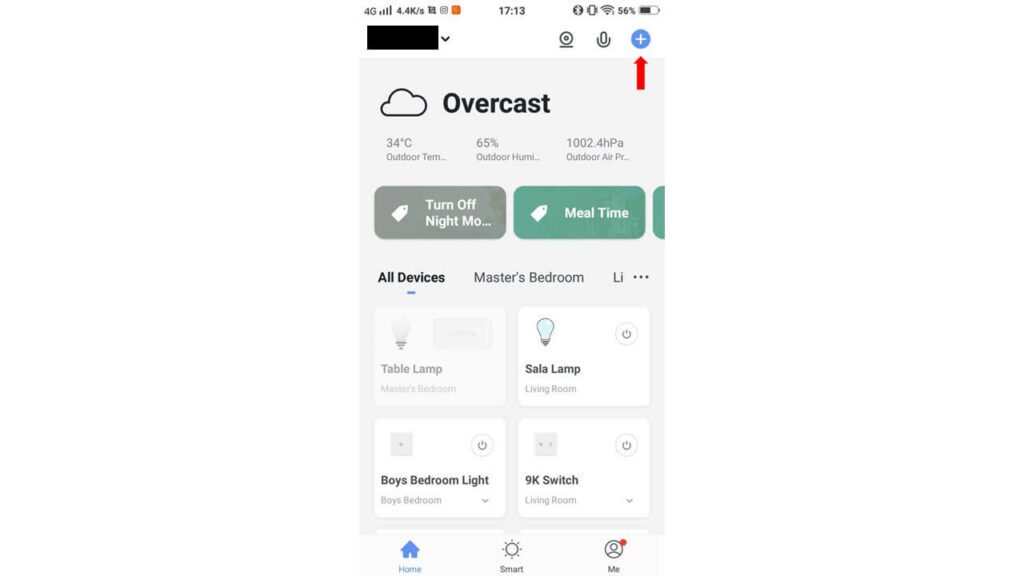
2. Open the Smart Life app and press the “+” button on the upper right-hand corner of the screen.
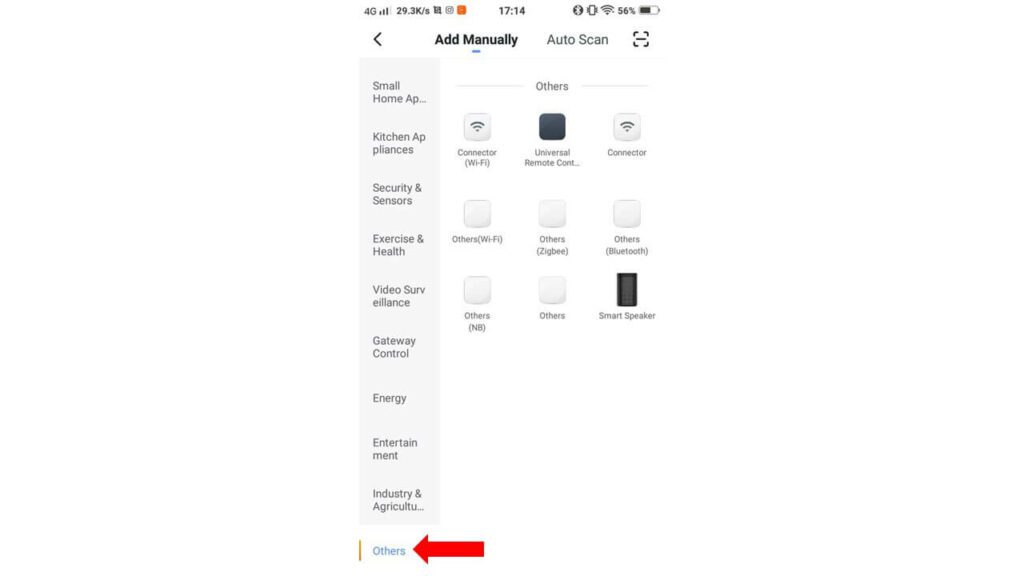
3. Go to the Others tab
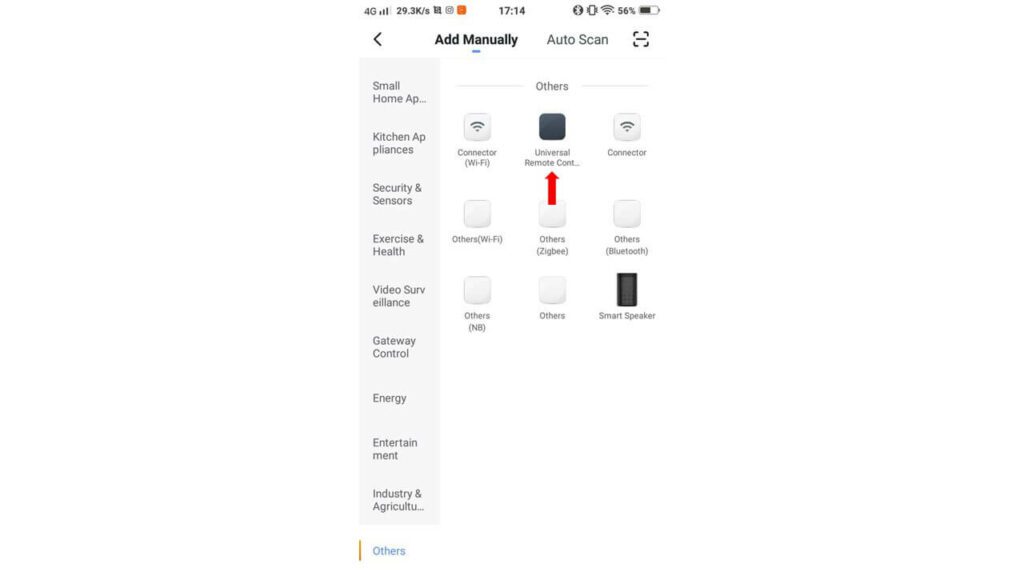
4. Choose Universal Remote Control
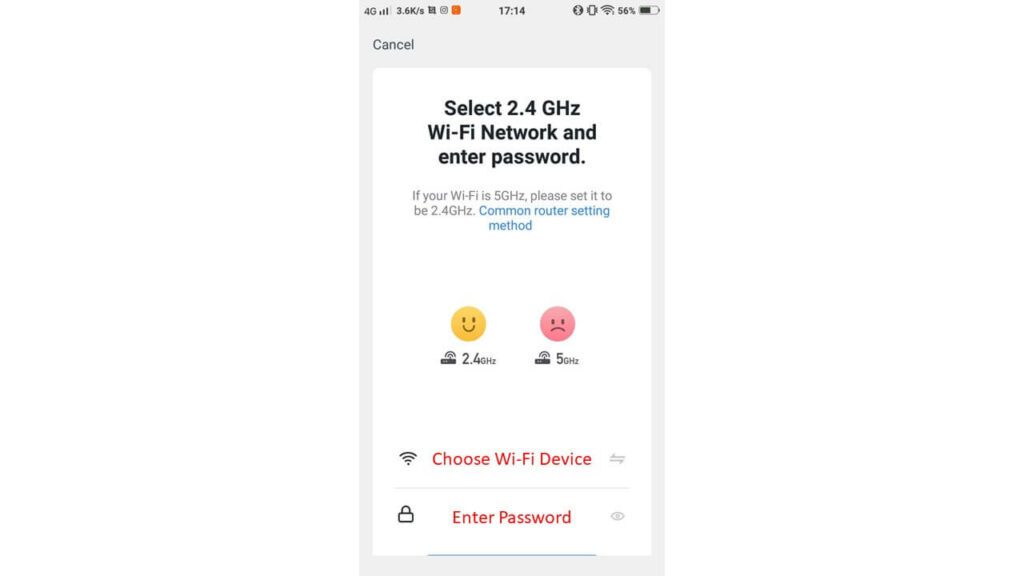
5. Choose your router and enter the password (Note: Only the 2.4Ghz frequency of your router will be detected by the Universal Smart Remote Control)
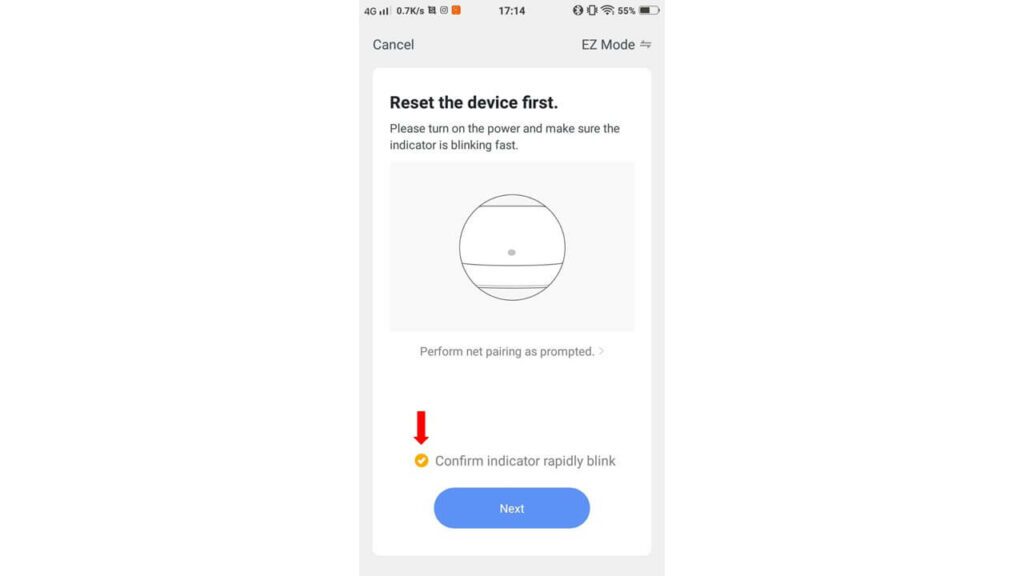
6. Check if the indicator light of the Smart Remote is blinking rapidly (2 times in one second). If so, tap on Confirm indicator rapidly blink then press Next
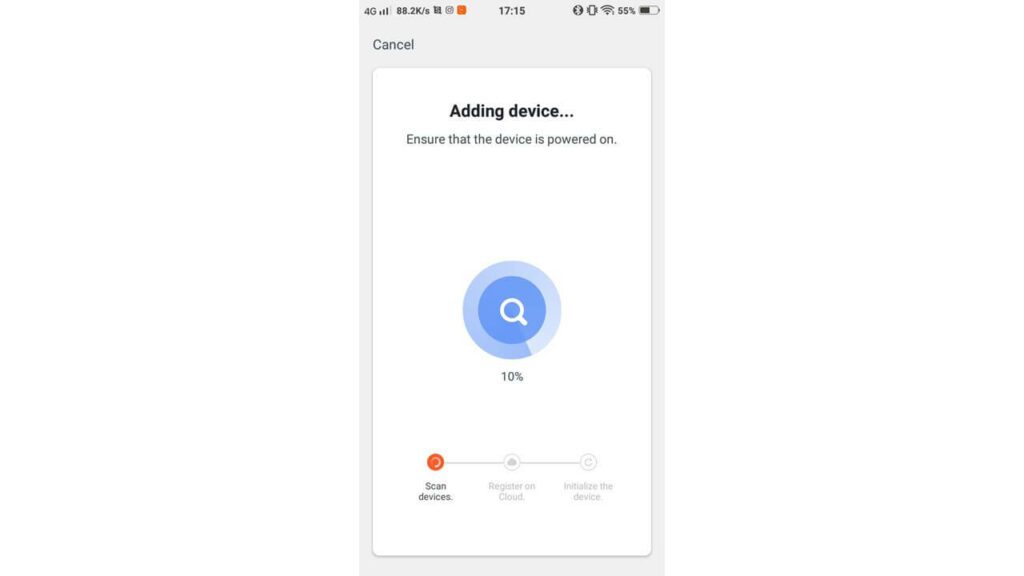
7. Wait for the app to complete the set-up
8. Name your your device. If you have more than one Smart Remote, we suggest that you include the room in the name for easier identification (ex. Living Room Remote).
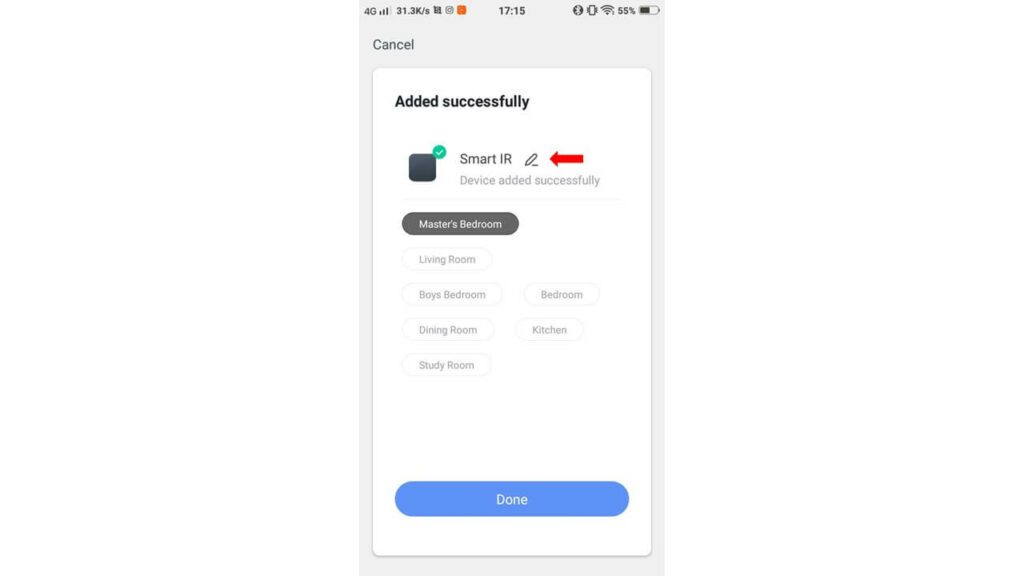
9. Assign the device to a room. This is handy when you have a lot of smart devices in your home and you want to view them by room. It will also help when you give voice commands to your smart assistant for each room.

Create a Virtual Remote Control
In this section, we will teach you how to create virtual remote controls for your TV and aircon. You can then use the process for your other infrared appliances such as TV box, electric fan (with IR remote control), etc. In case you missed the Important Information section in the Universal Smart IR Remote product page, please be advised that while the IR database of Smart Life supports a lot of major brands, there are still some models that aren’t supported yet. Do not worry, though, since the list is constantly being updated and you can also teach the Smart Remote most of the functions of your unrecognized appliance or device. We will also teach you the set-up process for that in this article.
Create a Virtual Remote Control for Your TV
Please note that we used an LG TV in the creation of this instruction manual. You can replicate the process for your TV as long as you find a compatible virtual remote in the IR database. If it’s a bit confusing right now, don’t worry. You’ll understand this when you read the section below.
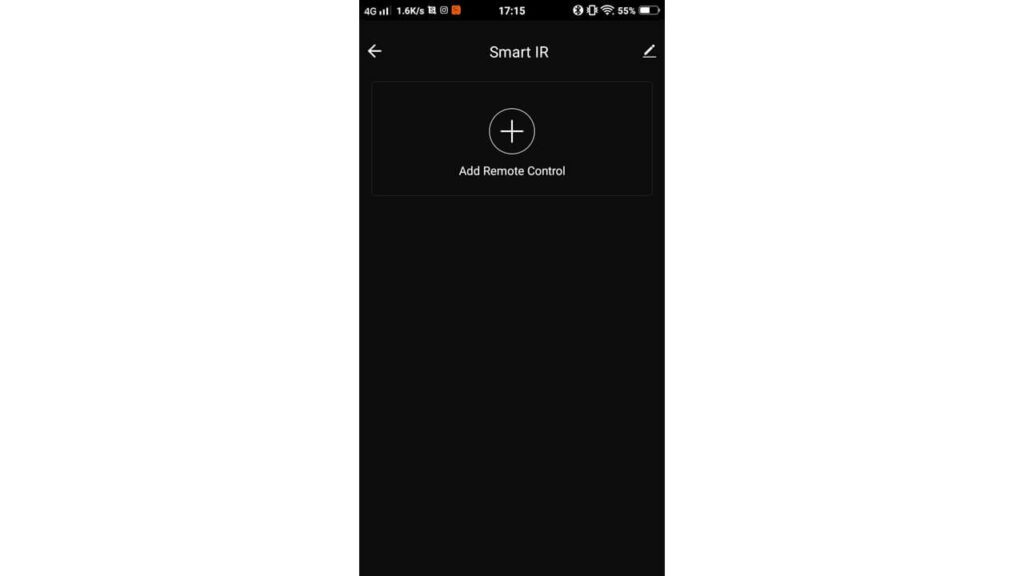
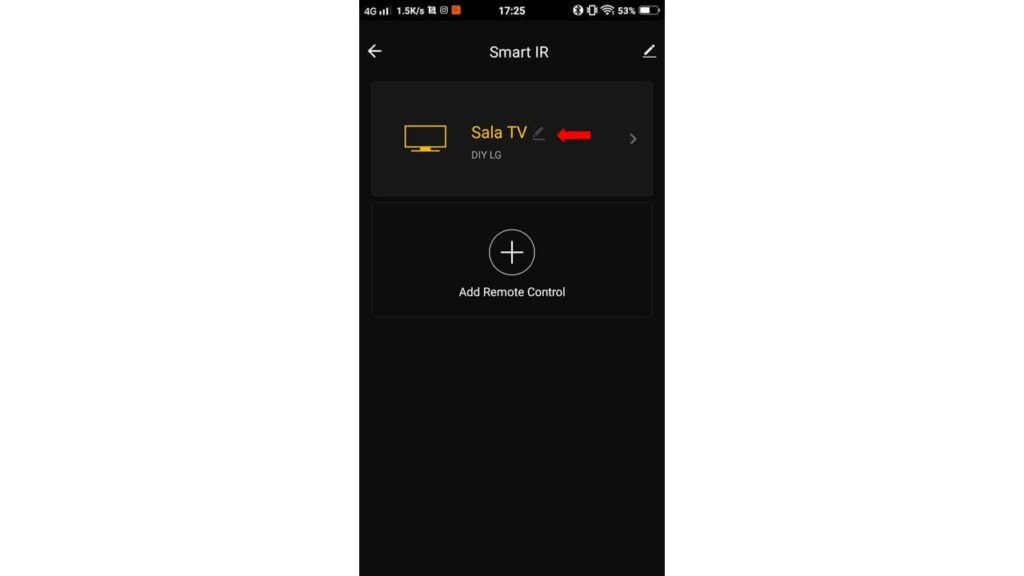
1. Open the Smart Life app and tap on the Smart Remote icon. You should see the screen below or something similar to it in case Smart Life has updated its interface by the time your read this article

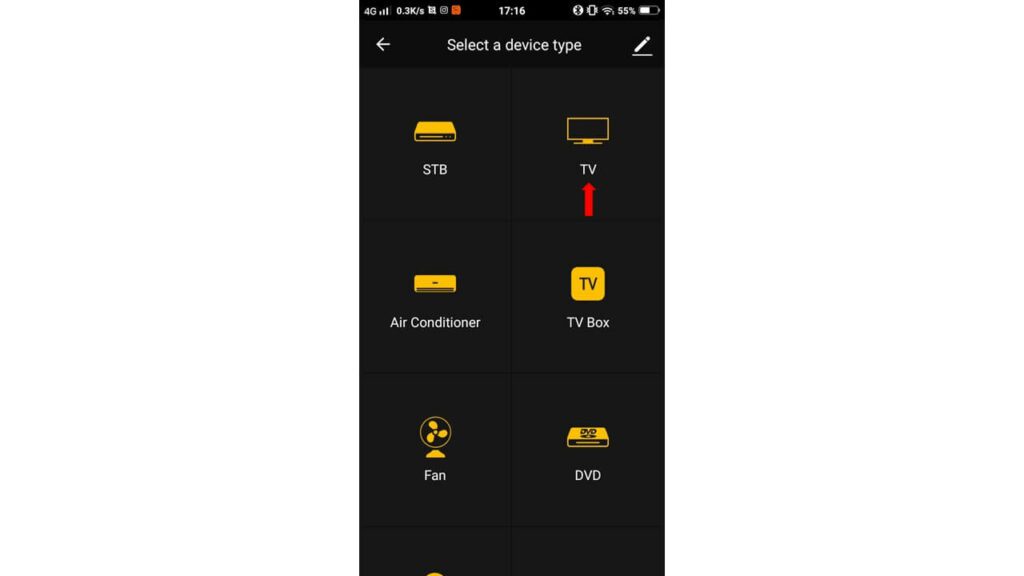
2. Tap on the TV icon
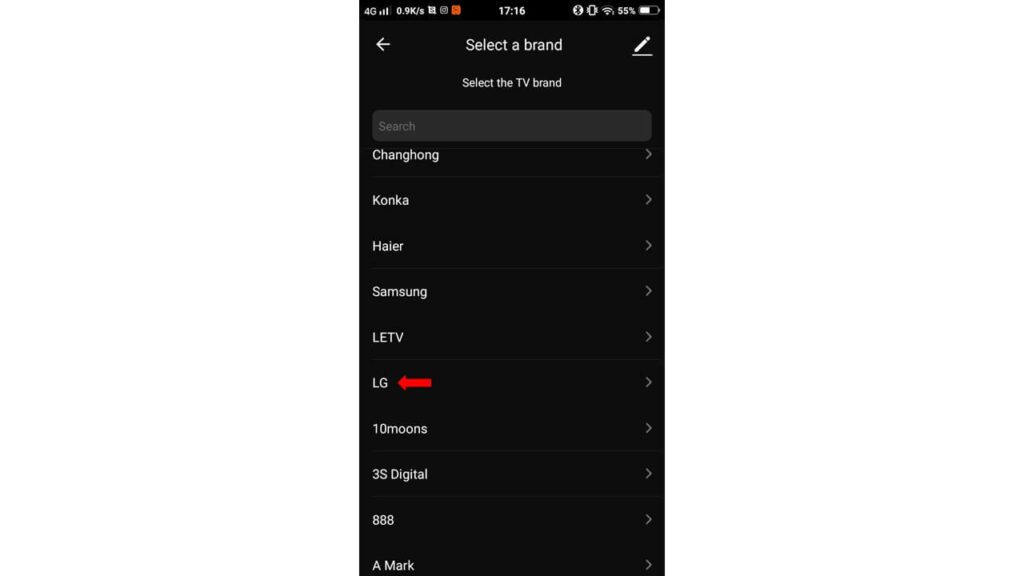
3. Look for the brand of your TV. As mentioned above, we used an LG TV for this set-up.
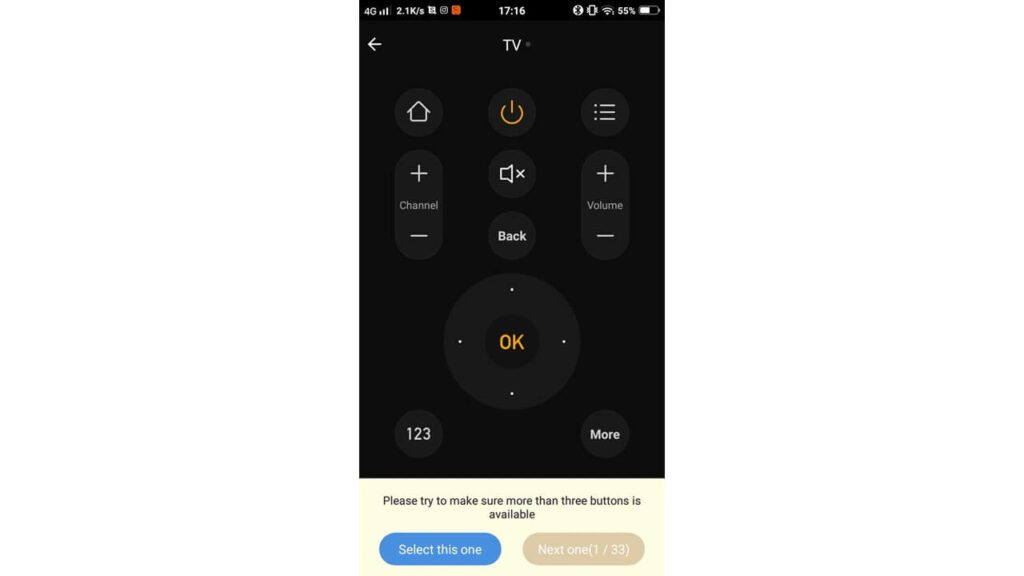
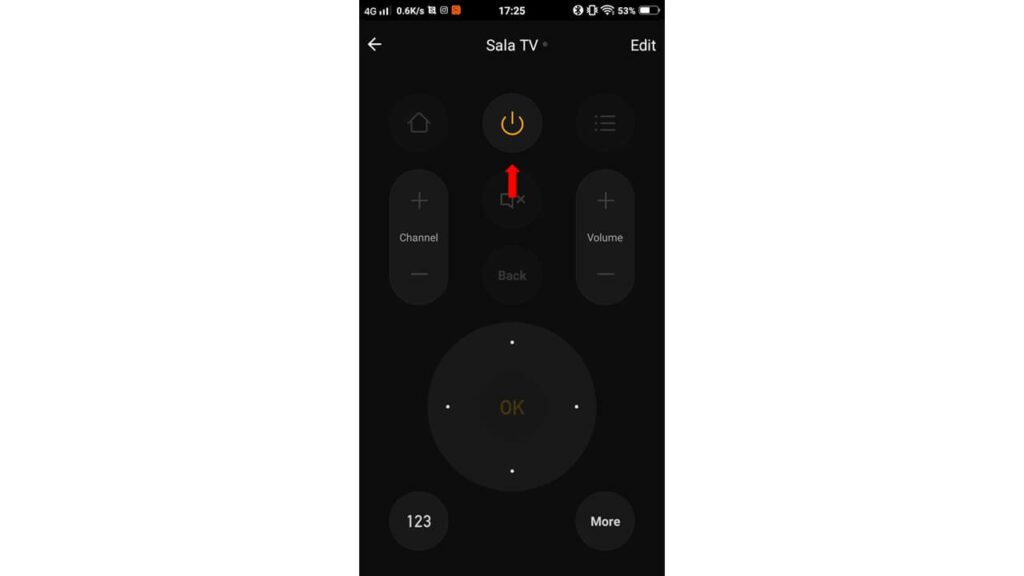
4. You will see a virtual remote control on your screen. Test at least 3 buttons to see if they’re working. We normally start with the Power button then go to Increase/Decrease Volume and the Home button after. You can test other buttons if you want but the important thing is that at least 3 buttons are working. When the virtual remote passes this test, tap on Select this one found on the lower left section of the screen. If it doesn’t pass the test, tap on Next one. Repeat the process until you find a virtual remote that has at least 3 buttons working. Note that you might have to go through a lot of virtual remote controls before you find one that works with your appliance or device.
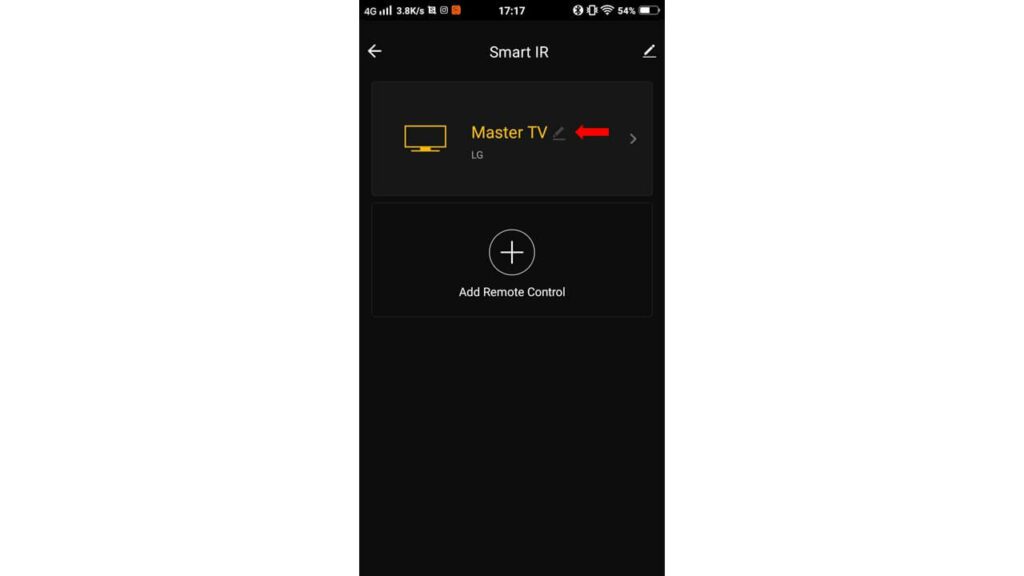
5. Once you find a compatible virtual remote control, give it a name for easier identification.
6. You’re done! You can now control your IR appliance through the Smart Life app. If you have Google Home or Amazon Alexa smart speakers in your home, you can now give basic voice commands to control your TV!
Click on the link to view or download the list of functions in the Smart Life app and basic voice commands you can give to Google Assistant or Amazon Alexa – UWR Functions and Commands. This is just a basic list that we compiled for you. The list of commands and functions may grow as Google and Alexa become smarter so it’s good to test new commands from time to time =)
Create a Virtual Remote Control for Your Aircon
Please note that we used a Panasonic window type aircon in the creation of this instruction manual. You can replicate the process for your aircon unit as long as you find a compatible virtual remote in the IR database.
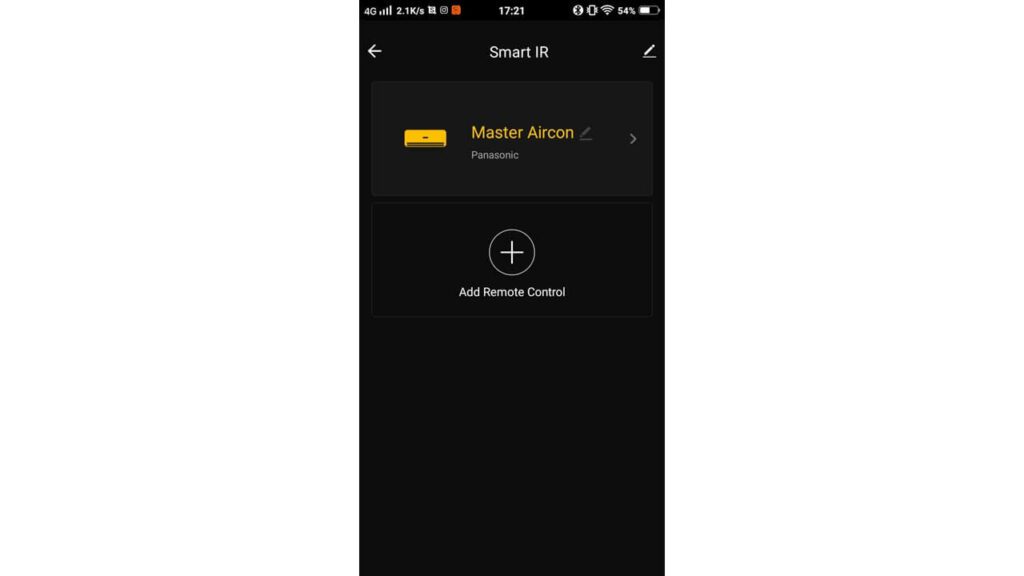
1. Open the Smart Life app and tap on the Smart Remote icon. You should see the screen below or something similar to it in case Smart Life has updated its interface by the time your read this article.

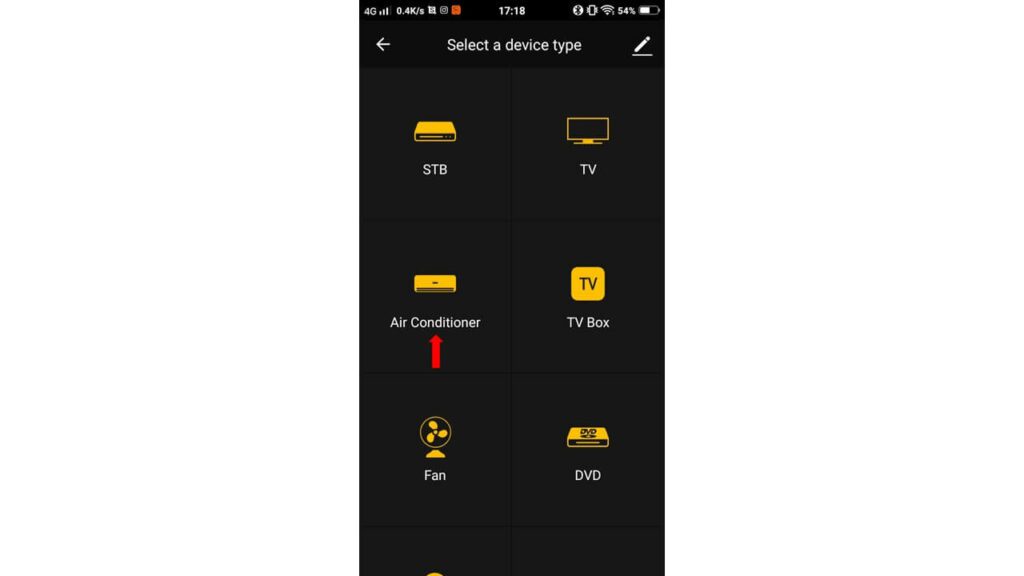
2. Tap on the Air Conditioner icon
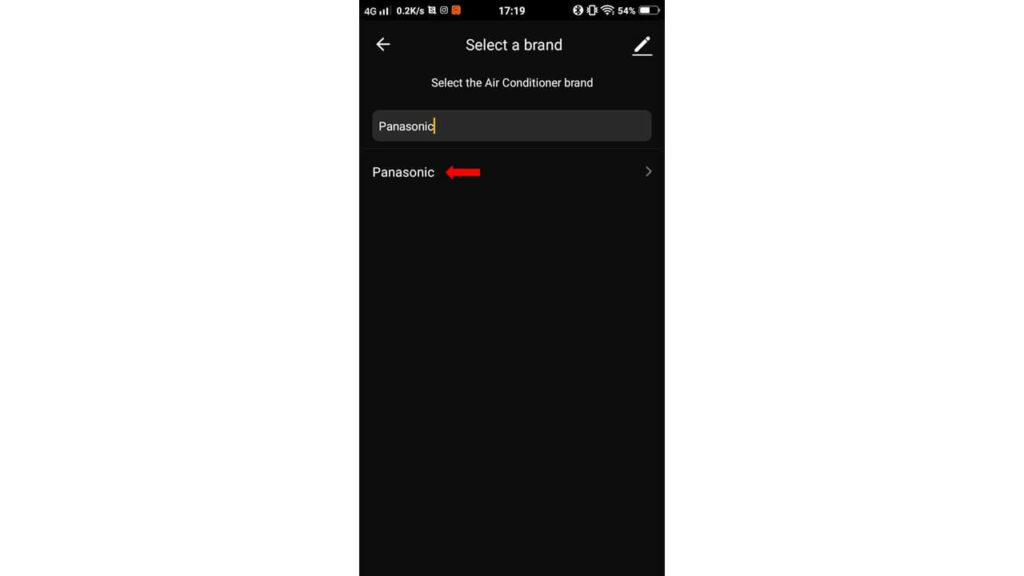
3. Look for the brand of your aircon. You may use the search bar so you can find the brand of your unit faster. As mentioned above, we used a window type Panasonic aircon for this set-up.
4. You will see a virtual remote control on your screen. Test at least 3 buttons to see if they’re working. We normally start with the Power button then go to Increase/Decrease Temperature and the Mode button after. You can test other buttons if you want but the important thing is that at least 3 buttons are working. When the virtual remote passes this test, tap on Select this one found on the lower left section of the screen. If it doesn’t pass the test, tap on Next one. Repeat the process until you find a virtual remote that has at least 3 buttons working. Note that you might have to go through a lot of virtual remote controls before you find one that works with your appliance or device. When we set-up the Panasonic aircon, we actually went through 22 virtual remote controls before we found one that’s working with our unit.

6. You’re done! You can now control your IR appliance through the Smart Life app. If you have Google Home or Amazon Alexa smart speakers in your home, you can now give basic voice commands to control your aircon!
Click on the link to view or download the list of functions in the Smart Life app and basic voice commands you can give to Google Assistant or Amazon Alexa – UWR Functions and Commands. This is just a basic list that we compiled for you. The list of commands and functions may grow as Google and Alexa become smarter so it’s good to test new commands from time to time =)
Create a DIY Remote Control for Your Appliance
1. Open the Smart Life app and tap on the Smart Remote icon. You should see the screen below or something similar to it in case Smart Life has updated its interface by the time your read this article.
2. Tap on the DIY icon
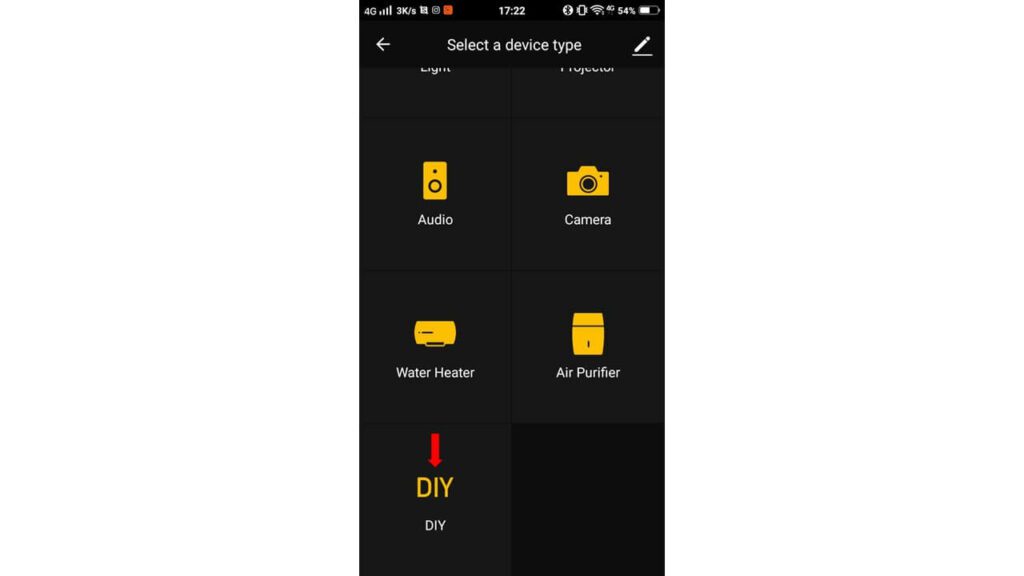
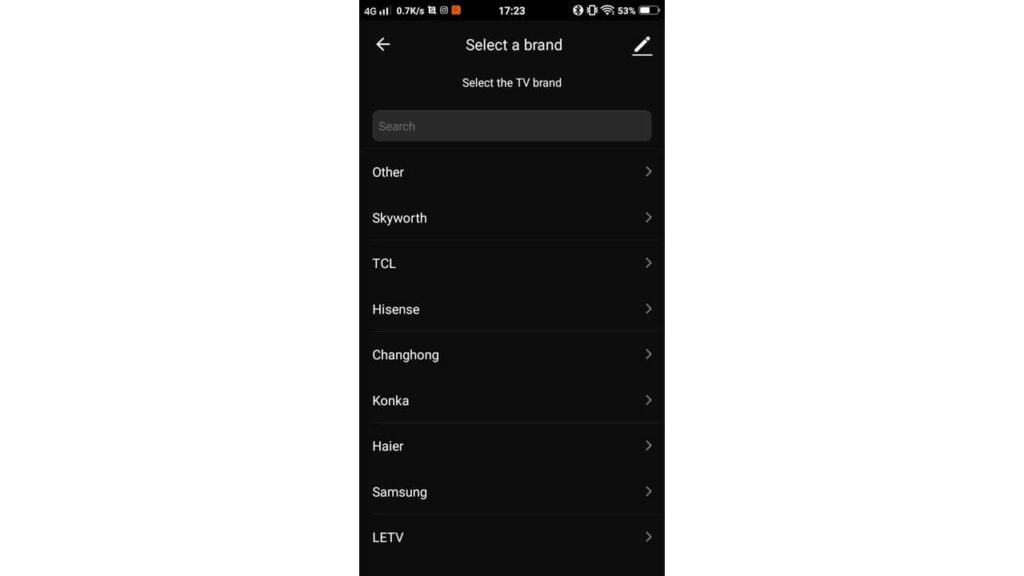
3. Select the brand of your unrecognized appliance or device. If you cannot find it in the list, choose Other
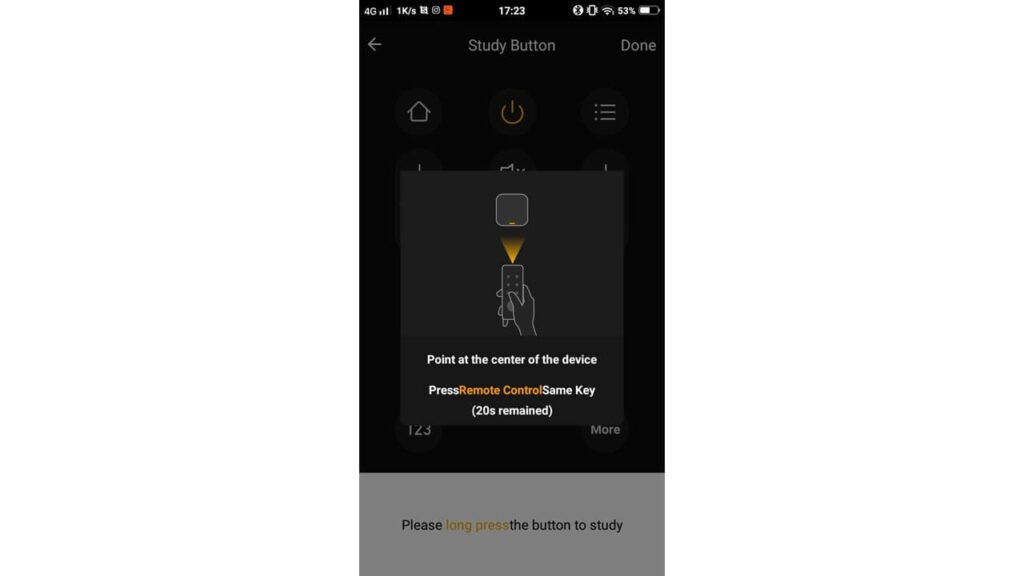
4. Choose which button you want the Smart Remote to learn. For example, if you want it to learn the Power button of your physical remote control, tap on the Power button of the virtual remote control until you see the message prompt below. Once you see it, you now have 20 seconds to teach the smart remote to recognize the Power signal from your physical remote control.
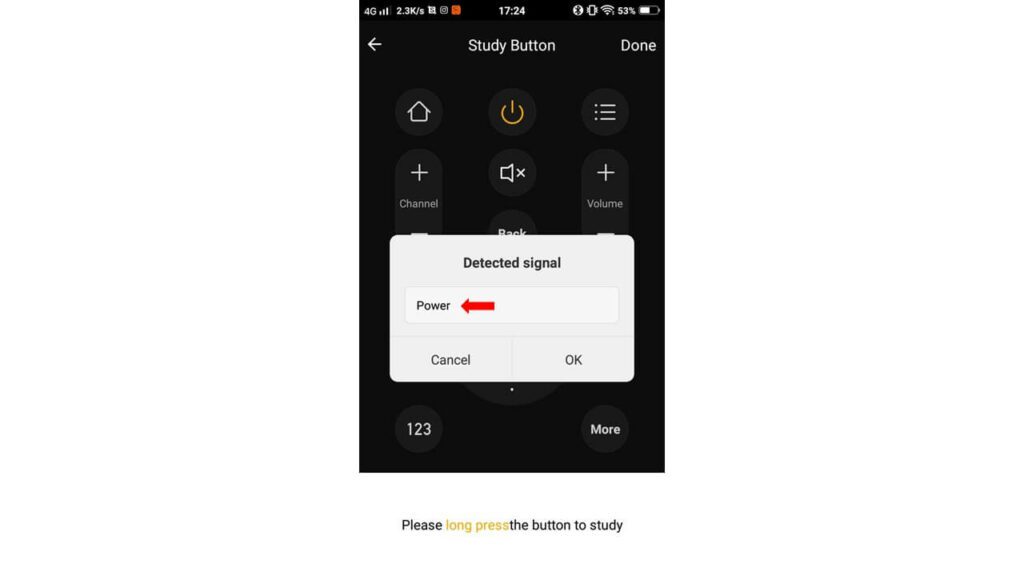
5. Get your physical remote control and point it at the Smart Remote. Since we used the Power button for this example, press on the Power button while it’s pointed at the Smart Remote. You should see a message prompt below when the device has detected the signal. Give the frequency signal a name (ex. Power).
6. Repeat the process until you’ve assigned the different functions of your physical remote to its virtual counterpart. You don’t need to assign a signal for all of the virtual buttons – only those that you frequently use. In the image below, you can see that only the Power button is available since that is the only button that we programmed the Smart Remote to recognize.
7. Once done, name your DIY remote for easier identification.
Enjoy your new Universal Smart IR Remote! To get Smart Home tips and tricks, please follow our Facebook page, It’s totally free and you will also be notified when we have new products and promos.
Smart life begins with Eden Robot

